Outer contour
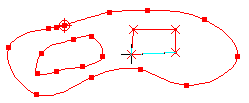
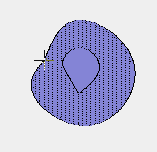
 In this input mode, the automatic is defined by inputting its outer perimeter. The contours of the automatic can take any form as long as the perimeter never crosses.
Holes can be defined inside the contour by pressing the hole-button  present in the popup menu, see also the respective chapter34_TZI..
You can also create an outline by adopting a drawing line, please refer the corresponding topicIADD6.
In the stitch calculation any shadow regions in the area are filled using the Complex Fill algorithm, runnings are calculated automatically.
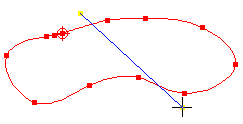
The stitch direction of the digitized area is defined by clicking on the stitch direction button  on the popup-menu followed by input of 2 points defining the direction line. It is possible to enter more lines or stitch direction curves. So you can create turned or wavy step. After having finished the input of the stitch direction, you have to click twice on the stitch direction button to come back to normal punching mode. Please refer the respective chapter4MI2T3. If you don’t input any stitch direction line, horizontal stitch direction is assumed.
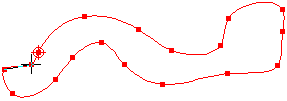
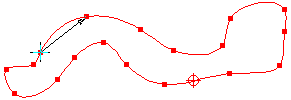
Startpoint of the automatic is the first digitized point, the endpoint is he same point, because the contour is always closed. Start- and endpoint can be moved to any point using the buttons 
 .If the endpoint is not set to a point on the contour or on a hole, the stitches to the nearest point on the edge of the area are calculated and one extra stitch to the endpoint is added.
Corners within contours are defined by either double clicking on the required position, or by pressing the corner-button  present in the parameter line and in the popup menu. This button also allows you to remove corners. A corner is displayed as a cross
The Type of edging1O9U6M4 (curve or straight line) used for the contour is defined using the form-button 
 , see also the respective chapter.
The DistanceH8HP3U is defined using the edit box  in the parameter line, see also the respective chapter.
Areas of different stitch type, so called islands, can be input after having clicked on the respective button  on the popup menu. Please refer also the respective chapter1K3JEVR.
Additional contours with exactly the same parameter set (distance, stitch direction, fill type etc.) can be input after having clicked on the additional contour button  .
.
Please refer also the respective chapterS_.E7Y
An outer contour area can be switched into a structured automatic, a center line or a step stitch line using the buttons  .
.
Transformation into a structured automatic12XCNUG is recommended, if you want to fill the contour with satin stitches or if you want to have contour cuts and stitch directions.
Created with the Personal Edition of HelpNDoc: Easily create HTML Help documents