Set start/endpoint
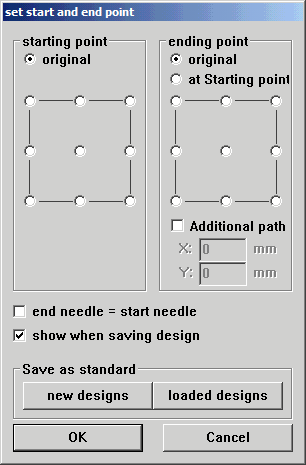
With this function you can set the start or endpoint of the design at any position. The 9 points you can choose are related to the bounding box of the whole design. That means, if all modules of the design are grouped together, the 9 points are exactly the 9 dots of the box. The selected points are also highlighted on the button  , which also opens this window.
If the switch original is set, the design remains the same and the button is displayed as being not pressed.
The endpoint can also be set on the starting point or it could be Added with an additional path, which is made starting at the defined endpoint.
The stitches added this way are visible on the screen, but they cannot be edited.
If the switch end-needle = start-needle is set, an needle change command back to the first needle is added at the end of the design.
The settings for start- and endpoint are saved with the design and are still existent when reopening the design. To define how to handle designs , which don’t have a start-endpoint definition yet, you can define a standard. This is done separately for new designs which are created currently and for loaded designs, which are still existing and are loaded either from disc or from the database. You should define once the desired combination of start- and endpoint and then press the buttons new designs or loaded designs. After opening the design the start- and endpoint is assigned to this design. You can change this assignment whenever you want by clicking on the button.
Created with the Personal Edition of HelpNDoc: Transform your help documentation into a stunning website